Sunday, February 12, 2012

Wishing

I started at the beginning and read through my blog and everyone's comments today. I am happy with the quilt and the blog. I appreciate this method of teaching us about Information Inquiry. We could chose our subject and learn about it. This makes it more exciting and fun.

What did I learn?

  1. I learned how important visual props can be. Example: Most of my contact and information was either phone calls or emails. There was no hands on with my "instructor." Because of this experience, I began making videos for my online students to access from the web page.
  2. I learned that I can learn from my mistakes. I didn't think to ask about the size of the quilting machine. That was an assumption on my part.
  3. I learned to set limits for myself. It was okay to start with precut fabric pieces. The product wasn't as important as the process. But I love my quilt!
  4. I learned that Inquiry is definitely not linear, as indicated in my Concept Map. I was all over the place going back to Wondering and Webbing many times.
  5. I learned that students don't have to be robots; they can have their own ideas.
  6. I learned that there are many ways to teach a concept. We just participated in a great one!

I also reviewed what technology-based elaborations I used. They are:

  1. Concept Map - included in the blog. It indicates my Inquiry Process.
  2. Web-based Tool - OneNote was used to keep track of my notes. OneNote can be viewed through Microsoft Live or I also will put a link on the blog.
  3. Bibliography - included in OneNote. I will attach it to my paper.
  4. Electronic Communication Tool - I used email to correspond with my friend. Some of the emails are included in the blog.
  5. Productivity Tool - I used a digital camera to document the steps in the creation of the quilt. I also created a mobile blog to access my Quilting Quest blog.
  6. Notetaking Tool - Microsoft OneNote - The note book has several folders, quotes, resources, emails, Paper outline and ideas, my Wondering questions and shopping list.

My overall impression of this project is that it is a very good assignment. I was allowed to take ownership of my education. I was doing something. As John Dewey (1916) said, "The type of activities that stimulate real involvement give pupils something to do, not something to learn; and the doing is of such a nature as to demand thinking, or the intentional noting of connections; learning naturally results" (Democracy and Education, p. 181).

Saturday, February 11, 2012

Waving!

Here it is! I finally finished it today! Now what do I do with it? What do I do with the information I obtained? First, the quilt will go to my son. Secondly, the finished product is more than the finished product. It is the steps traveled and the knowledge gained. Yes, I learned to make a quilt. I also learned there is a lot more to quilting that I don't know. I didn't design the pattern. I didn't cut out the shapes, but I did sew them together and completed the project. I now know more about what is involved in piecing a quilt and found that I enjoy it. What does this do for my classroom? By forcing myself to think about the inquiry process, it will change my classroom. I was at a disadvantage with my source because it was all distance learning. (I need to remember that with my IUPUI students who are taking an online course with me). I needed the visual aids to complete the quilt. Because of this experience, I began making videos with camtasia software and posting the videos for my students to see what the program should look like and how it should run when it is completed. There is more, but I will save that for Wishing, the subject of tomorrow's blog. For now, I am celebrating!
A part of Waving should include explaining your process. I have included a Concept Map of the process and will go into greater detail tomorrow about the map. When you study the map, you can see that nothing was ever linear. I would get started and then would have to go back for more information whether it was from my friend, from a quilting book or magazine, a library friend or the quilting lady. "It is important to recognize that the process of scientific inquiry is not linear. When students learn about the process, they often try to simplify it into a series of steps to follow. Teachers, too, often teach inquiry as the “scientific method” with a lock-step linear process. Why do students and teachers try to make inquiry a step-by-step process? They are misled by the formal, orderly way scientific research is published. Students and teachers may believe that scientists went about answering their questions in the same orderly fashion. In fact, that is not how science is done. Aspects of scientific inquiry interact in complex ways. New evidence, new observations, and new lines of questioning can lead scientists in a circuitous route, the end of which, they hope, is a good explanation for a set of phenomena. For example, questions lead to the design of an investigation, and the evidence gathered through the investigation may lead to more questions"(Doing Science). http://science.education.nih.gov/supplements/nih6/inquiry/guide/info_process-c.htm

Concept Map

Weaving . . . in a bind! :)

I guess you could say that I am in a bind! I am using the pieces that were cut off because I made the quilt too wide for the binding. There are several ways to finish a quilt, but taking the advice of the experts, I folded 1-2" wide long strips in half, pressed the strips and sewed them to the quilt. Next, pin the folded edge over on the quilt and hand sew the binding. They told me I could machine stitch it if I wanted, but most professional quilters hand stitch. Well, I want to be a professional so I hand stitched it. Which was relaxing because I could watch TV at the same time. (I have not watched TV in several years). A little bit of Webbing here . . .

I had to make a quick email to my friend. I didn't know how to do the corners. I found the professional way was to fold the very tip of the corner in and fold the sides in and over it. It gives it a mitered look, like a picture frame.

This is the content from our email:

Regarding the binding...I think you are telling me that you have sufficient fabric on the top to turn under and stitch it down. Some people like the looks of that; however, that is not what most quilters do.

I prefer cutting 2 1/4 inch strips (WOF=width of fabric) sufficient to go around the quilt. Join the strips using a 45 degree angle so that the bulk of the seam is not all in one place. After joining the strips fold the one long strip in half length-wise and iron it. Place the raw edges along the raw edges of the quilt and stitch 1/4 inch seam. Turn the binding to the back (this will be the folded edge) and hand stitch in place using a blind stitch about 1/8 to 1/4 inch apart.

How do you handle the corners, you say?? Well, you miter them. Look up on the internet mitering corners of binding. About.com or other sites should have tutorials on how to do this. In this case, pictures are worth a thousand words. I could demonstrate much better than I can tell how to do it.

Some people attach the raw edge to the back side of the quilt and bring the folded edge up to the front and machine sew it down. In my book, that is hard to do and have it look nice.

I have never looked deeply into getting a top-quilting machine. I have heard that the width of work space is a major concern (I think that this would be very important.) Some of the cheaper machines only allow 8 inches wide quilting space across the quilt. I fear that would limit you too-o-o much. the other thing to consider....how wide of a quilt can one comfortably quilt. If you think you will only be making full-size bed quilts...okay, the smaller machine might work. However, most people have queen or king size beds anymore. Therefore, I am thinking don't limit yourself too much!

Hopefully, this epistle has answered your questions. If not, send me more questions. Eleanor

My email:

Good morning!I took my quilt to the quilter lady and now I can't wait to get it back. I saw her machine, it is huge. It takes up her entire familyroom. I have a question for you. When I get it back, what is the best way to bind it? There is enough all the way around to use it and turn it under and stitch it. But I'm not sure if that is the correct or the best way to bind it. I don't want to mess it up at this point! Also, I read that lady's blog about her less expensive machine. What do you think? She sems to like to okay for just doing her own quilting. Hope you are both well! Thanks for your help, Cathy

Thank you! You have answered my questions! and yes, I don't want to be "stuck" making only smaller quilts. I think I will wait and see what I like to do. It's probably too early in my endeavors to jump at purchasing something anyway. thanks again and have a great weekend! Cathy

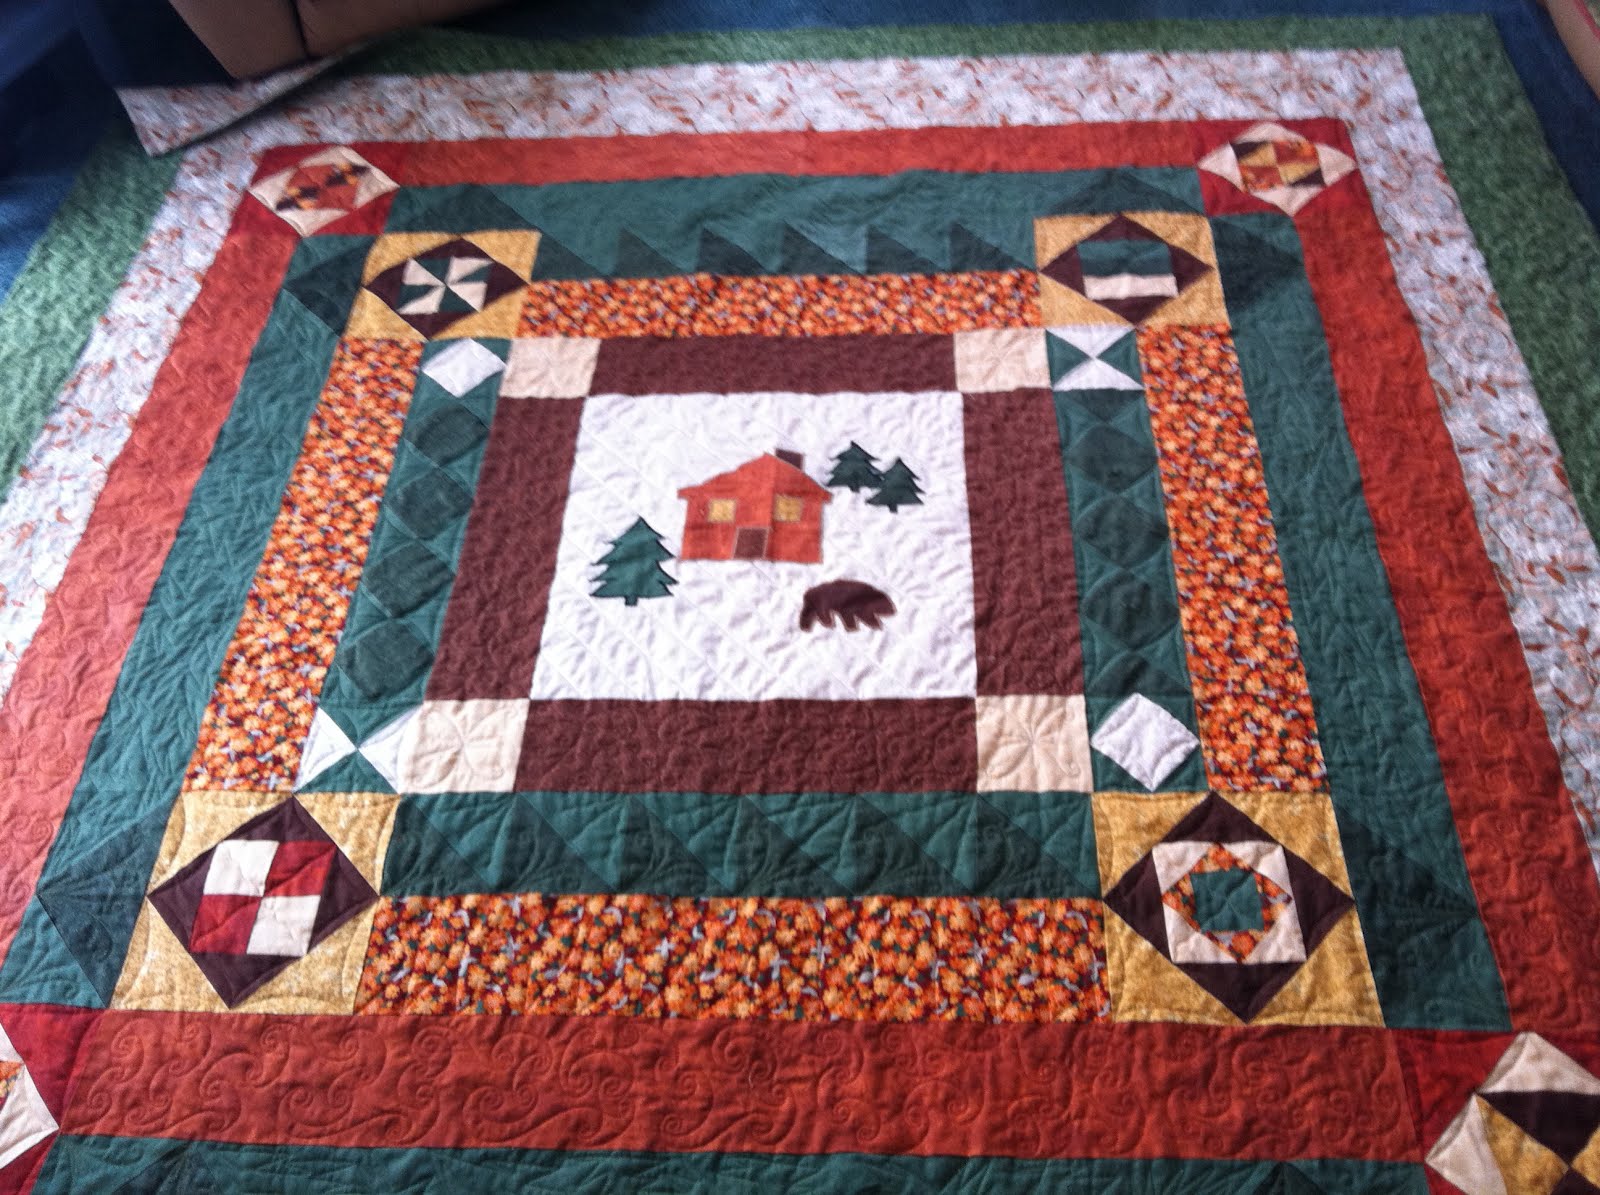
Image of the folded fabric for the binding.
Image of the binding attached to the quilt.
Image of the attached binding pinned in place for hand-stitching.
Documenting step-by-step progress would be a good way to keep students on track and also to encourage them when they make a mistake. The teacher can say, yes, you made a mistake, but look at what you have done so far. The classroom should be a place where students, both adults and children aren't afraid to make a mistake. “Learning happens fastest when the novices trust the setting so much they aren’t afraid to take risks, make mistakes, or do something stupid"(D. Meir, 2002). http://www.nassp.org/tabid/3788/default.aspx?topic=Trust_The_Key_to_Leading_a_Learning_School

Webbing . . . and A little bit of Waving!

I picked up my quilt last evening!  She trimmed it down to fit her quilting machine and did some really fancy designs on it.  I am attaching a photo that shows it without the edges bound.  Before picking up the quilt, I talked again to my quilter friend and asked how to bind (that's the big word for finishing the edges).  In a classroom, I would add the word to a spelling/vocabulary list as an important word to know, because it is the correct term to use in reference to this step.  My friend told me how to bind the edges, but I also thought I would ask this lady because she is also an expert and I can see a visual example as well as oral instruction.
"It is estimated that 40 - 65% of the population may be classified as visual learners. Visual learners learn best when concepts are presented in a graphical format" (Lamb). I am finding so much of my instruction on this project was oral that many times it was difficult to grasp the concept.  Sometimes it made me nervous, not wanting to make a mistake on my quilt.  I was also worried about the quilt being square.  I asked for suggestions on next time I make a quilt.  She assured me my quilt was very square.  She said she was surprised because many people who quilt all the time bring her quilts that are not square and she has to work very hard to make them line up on her machine.  I was happy to know that I was doing that correctly!  Encouragement goes a long way doesn't it? Putting myself in a student's shoes, I can see how that little bit of encouragement makes the student want to keep on going with the project.  I was nervous to take the quilt to her originally.  Embarrassed too.  Unsure.  That encouragement meant a lot!
Teachers should "link learning success to students' personal effort and ability." (Callison, The Blue Book, p. 440).


Image of unfinished edge of quilt.
Now it is time for BINDING.

Friday, February 10, 2012

oops! - Webbing?

I have anxiously been waiting to here from the lady machine-quilting my pieced top.  Well, I heard from her yesterday and I made a mistake, but it's easily fixable.  She just wanted to know how to proceed.  I made the quilt king size but her machine will only go as wide as a queen size.  I really didn't need it to be a king size.  I just had extra fabric and added it to the two sides because it was available.  Basically she is simply trimming the sides a few inches.  She said I may get it back today! 

That was something I didn't think to ask; how large could the quilt be?  So I made a mistake, but it was fixable and I learned from it.  So it's all good right? And according to How to Accept and Learn from your mistakes, I should be happy! 

"People who can learn from their mistakes are often some of the happiest folks around. They understand that life comes with its natural ups and downs, and they're not afraid to look themselves in the mirror, admit that they were wrong and move on to their next endeavor."
This may not be a professional-type quote.  I wouldn't use it in professional writing, but it got me smiling!

Saturday, February 4, 2012

Wiggle - Finished Top!

I finally have the top pieced, and took the pieced top, batting and backing to a lady who has a big quilting machine.  It has long rollers on both ends. The three layers are started at one end and rolled onto the other end.  The quilting machine is in the middle.  The quilter guides the quilting machine over the top of the quilt in a pattern.  When she is done, she will return it to me and I will finish the quilt by binding the sides.  I can't wait!  I am going to try to get a photograph of my quilt on her machine.

I talked to my friend who is the expert quilter.  She said my quilt was too larger to do on a regular machine, that I would not be able to roll it up small enough to get the sides through the machine in order to quilt the center.  Her recommendation was either hand quilt it or take it to someone with this big machine.

I asked where to find someone locally to do this.  She told me to look for a quilting group and contact them.  So, I asked at the library and they put me in touch with a quilting group, who then recommended this lady.  They also invited me to join the group!  I told them I was a beginner and was told that was fine, that everyone has to start somewhere.  I asked what they do and was told they meet once a month on Tuesday evenings and talk about their projects, give suggestions and just have a good time.  I am thinking of joining them.  I think I would learn a lot from this group of ladies. Life-long learning right?

It appears to me that what they are doing, is continuing to learn from each other and also participate in "waving" showing what they have accomplished.  

Here is the finished top:


Wednesday, February 1, 2012

Wiggle, Wiggle, Wiggle!

Over the past few days, I was able to complete the last of the quilt blocks that will make up the quilt.  I made some changes to one block, I guess this is where prior knowledge comes into play.  The center block was supposed to be a floral design, but since this was going to be on my son's bed, I thought better change that!  I knew how to applique, having done it many times before.  I drew a pattern with a log cabin, pine trees and a bear and appliqued them to the center square.  I used the fabric that was supposed to be flowers, so everything still matched.


This step reminded me of some of my students who take the directions I give them, use them to create something different.  I used to think I should mark off for not following directions, but as I thought about it, I decided I didn't want to create little robots that simply followed instructions to a T.  Where is the creativity and imagination in that?  So a student can create a computer program that I step-by-step helped him do.  The student that took that program and developed his own project, that still followed my directions, was adding more to the learning experience.  I began rewarding these ideas and asking what else could be done with the new information.  This time the teacher learned from the student.  

I hope if the designer of the instructions for this quilt project would feel the same!

The final pieces are not squares, but pieced strips that will bind the pieces together.


The next step will be to put the pieces together, but I also want to do some research on how I am going to actually quilt the pieced top to the batting and backing.  Time for another phone call to my friend.


Wednesday, January 25, 2012

More Wiggling


I was able to complete three more squares last evening.  I was glad that I read about pressing and the importance of it.  These 3 squares were more complex, but they came out square! 

As I reflect on the process of sewing the pieces together, I see how with practice I am becoming better and faster at making the squares. They are coming out square and I am more confident. I understand the importance of pressing each seam before sewing the next one. Practice makes perfect, as the saying goes. Students get better in inquiry the more they are allowed to practice it and the more they are allowed choices, as we were allowed choices with our inquiry subject.

Webbing Again


I did a little research on how to press the seams.  I found an article online by Janet Wickell, "How to Press Quilt Blocks."  She spoke about the importance of pressing the seams as you go. 

"Your piecing accuracy will improve immediately when you take a bit of time to press your quilt blocks as you make them. Pressing is an extra step, but you'// love the payoff in time saved when your quilt blocks fit together just like they should.

http://quilting.about.com/od/pressingtechniques/ss/press_blocks.htm

I did find that if I pressed each seam by blocks came out more square and the points were more exact.

But my real question was how do you determine which way to press, open or to the side.

I found another web site that says " ...most quilters today press seams to one side."  They tested it and "found that blocks with seams pressed to one side are usually a little smaller than those with seams pressed open.  Hand-sewn blocks need the security of a seam pressed to one side, but machine sewers should determine what works best for them." 

This comes from Ask Jinny at 

http://www.jinnybeyer.com/jinnys-corner/ask-jinny/answer.cfm?questionID=466EE625-B054-177E-6D5ABFE737BAF506

I guess it answers my question.  So I will follow directions!

Dr. Lamb has stressed that "information inquiry is not linear!" This proves her point. I have gone back again and again to gain more information. I see the process in a bunch of curly little circles that goes back to wondering and webbing many times.

Tuesday, January 24, 2012

Wiggling some more!

Last night I excitedly opened the package to the first quilt square. The instructions were very easy to follow.  I put the 1/4" press foot on my sewing machine as my friend told me to do.  I pinned the pieces together and very carefully made sure they were 1/4" seams.

An interesting thing I found was that there are different ways to press the seams in quilting. You can press them open, or press them to either side.  The instructions illustrate which way you are to press each one.  I'm not sure what makes the difference.  I have always pressed seams open, but for now I will follow the directions and look up "how to press seams for quilting" later.

This is the first quilt piece.  The 3 middle strips are pressed toward the center strip.  Maybe because it is darker?  Anyone have any ideas?  After pressing, I pinned and sewed the 2 brown triangles. They are to be pressed toward the brown triangle.  See the little bit of fabric that is left hanging over the 3 strips block?  Those are dog ears; you cut them off.  (The instructions told me this).  Otherwise I would have had a pucker at all four corners when I sewed on the other two brown triangles.
Here it is with the four brown triangles and the first two gold triangles.  The seams are also pressed toward the triangles. The dog ears are again trimmed off.  (Sounds like I know what I'm doing doesnt it?) Next add the final two triangles and press!
Here is the finished first quilt square!  I continued and completed three more yesterday evening.  They are below.  Tonight I hope to do a few more.


 The hardest was the pinwheel, getting the points to line up were tricky.
I need to find out the mystery of Pressing!


Wiggling


Ok, I did it. I have a plan for the quilt.  You are probably going to think I am cheating, but oh well.  I don't want to get discouraged by lack of time, having to spend so much time cutting out the pieces, and I want to get started sewing.  So I bought precut quilt pieces. 

Here is my reasoning.  I really don't know what I want to do with this.  I may hate quilting once I get started.  There are so many patterns and ideas and colors to choose from.  I don't know enough about how to put the different patterns together that it would take me forever and I am afraid I would end up quitting.

While I was at JoAnn Fabrics, looking at fabrics, I went to the clearance area. (My very favorite aisle).  There was on the clearance shelf a complete set of the Quilt of the Month pattern for fall.  I started looking through them and decided this is what I need to do first!  Make a quilt with directions to follow.  (I hate directions).  These Quilt of the Month ideas are pretty cool.  There are 12 different patterns (duh) and directions for completing each design.  When I am finished, I will know how to design twelve different patterns.  It's cheaper than buying a book, because it comes with the fabrics too.  I don't have to think about what looks good together.  I simply learn by doing!  What a concept.  I should be a teacher!  Oh, wait, that's what I am!  So I was putting myself through all this stress, when the answer was right before me.  So I bought the set.  Regularly 7.99 a design, they were on clearance for 3.19, quite a deal right?  But wait!  There's more!  I had a coupon for 20% of my entire purchase.  Boy was I happy and couldn't wait to get home and get started. 
Here is a photo of what it's supposed to look like when I am finished.  

I find that I am happy with my decision on how to proceed. The stress is gone because there is a plan in place that is "do-able" for me. Is this a type of inference? I did the research and found what making the quilt would involve and considered my personal characteristics and made a decision. According to "The Blue Book", inference involves "the actions or processes for deriving a conclusion from facts and premises. Inference may involve personal choice and actions taken based on conclusions that seem most relevant and meaningful for the situation" (p. 7).

According to Carol Kuhlthau students go through a number of different feelings as they proceed through the stages including uncertainty, optimism, confusion, frustration, doubt, clarity, sense of direction, confidence, relief, and satisfaction or dissatisfaction. Their thoughts go from ambiguity to specificity and their interest increases. Their actions move from seeking relevant information to seeking pertinent information.

As I analyze my thought processes and my decision to use the precut pieces with instructions, her statements ring true.

Friday, January 20, 2012

Webbing Continues

I still haven't decided on what design to make for my quilt.  I browsed through the quilting books at the library and settled on two.  There are hundreds!

1. Learning to Quilt the Traditional Way by Annlee Landman. I chose this book because it was full color with lots of illustrations.

2. New Ideas for Lap Quilting by Georgia Bonesteel.  This one is also full color, but I chose it because I wanted to read about lap quilting. In addition this lady is a teacher, and I quote from her introduction, "As a teacher, I'm aware that quilting guidelines and standards have long been established, but I also know that new ideas in quilting abound."  Hey, I thought, she's a life-long learner and willing to explore new ideas.  So I'm toting her book home too.

My plan is to decide what I am doing and get fabric this weekend.  We are expecting an ice storm and I thought beginning my quilt would be a good thing to do if I was stuck at home.

My friend sent me an email with a photograph of a quilting machinine made by Gammell. I am attaching it.

She also sent me this email about the AccuQuilt:

Want to have some fun? Go to this website and see a list of 82 bloggers who have GOs and see what they are doing with them!! They will give you all sorts of ideas! Eleanor http://sewcalgal.blogspot.com/p/bloggers-with-accuquilt-products.html


Tuesday, January 17, 2012

Webbing


So, I called my friend and spent about an hour on the phone with her discussing how to begin.  I guess I should mention that I do sew a lot.  I have made many things and have even made wedding dresses for people.  This being said, it takes away the beginners stuff like how to thread the machine, etc.  I also have a medium priced sewing machine.  I bought it when a new model was coming in, so I got it pretty cheap.  It is a quilter’s machine and has lots of attachments that I have never used.  This will come in handy I’m sure.
In answer to my first question, she said she likes to cut with a straight-edge, rotary cutter and mat.  As for an Accuquilt, she does not have one but several or her friends do and they love it.  She just hasn’t invested the money in one.  www.accuquilt.com is the web site.  What it does is it cuts the shapes with dies.  You can cut about 6 layers of fabric with one.  I would like to have one because I don’t have that much time to quilt and don’t want to spend much of it cutting the fabric.  So this is a consideration for me. But first, I want to make a quilt before investing a lot of money.
The next question was batting.  She likes to use 100% cotton batting for quilts.  For wall-hangings she uses the polyester batting because it is lighter weight and easier to handle.  Cotton batting makes warm and cozy quilts! Her preference is Warm & Natural, cotton batting.  It can be purchased pre-packaged or by the yard; available at Walmart and also JoAnn Fabrics, and probably lots of other places.
For the back of a quilt, she likes to use cottons and flannels.  Flannels are cozy, but just pick what you like in a lightweight fabric.
Tips before piecing the shapes – She suggested washing all the fabrics first, but if you don’t wash all of them, then don’t wash any. That way they can all shrink the same.  Before beginning to piece the quilt, she suggested using a ¼” presser foot.  I looked through my attachments and found I had one!  She told me it was very important to make all the seams 1/4” if one wasn’t take it out and redo it. 
For the rest of the questions, she told me to call her back when I get it pieced together.  She did say that she did not recommend machine quilting a large quilt with my machine.  She said she sends her big quilts to a friend that has a long-arm quilting machine to finish for her.  She said we will talk about that after I get it pieced.  Her biggest recommendation was to be precise with measuring, cutting and sewing so that the quilt comes out even.  She said you will be surprised how getting off just a little will affect the look of the quilt.
My research to come: rotary cutters, mats, and long-arm quilting machines; the subjects of my next post!

I noticed that she stopped giving me information when she thought that I had enough to begin my project. She didn't want to overload me with too much information. She wanted me to explore the information and develop better questions. "At a more informed level, the questions become more focused. Exploration becomes a systematic search for and examination of resources and information to address specific questions" (Callison, p. 7).

http://www.joannfabrics.com

I went to Joann Fabrics web site for information on prices of rotary cutters and mats.

By choosing this lady as my primary source of information, I need to have confidence that information she gives me is correct. How do I make that determination? This is often a question students need to ask when they are doing research, particularly on the Internet. Students need to be taught to be discretionary in the information that they find. Everything on the Internet may not be true. New information that is assimilated should include "the interactive processes of critical analysis, debate, as well as comparing and contrasting facts and ideas (Fitzgerald 1999).

I know the information I am receiving from my friend is reliable because of her credentials. She teaches workshops, speaks at seminars and has been a quilter all her life. Children need to learn this discretion. Teachers can do inquiries into good and faulty information with students to help them understand this important technology education concept. There is a teacher web site to help you learn to evaluate Internet resources. http://eduscapes.com/tap/topic32.htm This also addresses the ISTE student standard of Research and Information Fluency - Students apply digitals tools to gather, evaluate, and use information. http://www.iste.org/standards/nets-for-students/nets-student-standards.aspx

I can see a quilt project being used across the curriculum in many content areas and many grade levels. It can be used in Geometry class to study shapes, in Math class to learn the concept of patterns and measuring. Quilting can also be used in Literature and History courses to study the Civil War. Quilts were made as pictorial representations of directions to the underground railroad for slaves. It was illegal for slaves to learn to read. Pictures were their means of communication.

Just a few of the many standards that can be addressed are:

Geometry Standards for 8th Grade Students deepen their understanding of plane and solid geometric shapes and properties by constructing shapes that meet given conditions, by identifying attributes of shapes, and by applying geometric concepts to solve problems.

8.4.1 Identify and describe basic properties of geometric shapes: altitudes, diagonals, angle bisectors, perpendicular bisectors, central angles, radii, diameters, and chords of circles. (Core Standard)

8.4.2 Perform simple constructions such as bisectors of segments and angles, copies of segments and angles, and perpendicular segments. Describe and justify the constructions. (Core Standard)

History Standards for 8th Grade

Students will examine the relationship and significance of themes, concepts, and movements in the development of United States history, including review of key ideas related to the colonization of America and the revolution and Founding Era. This will be followed by emphasis on social reform, national development and westward expansion, and the Civil War and Reconstruction period.

8.1.20 The Civil War and Reconstruction Period: 1850 to 1877. Analyze the causes and effects of events leading to the Civil War, including development of sectional conflict over slavery. (Core Standard)

Example: The Compromise of 1850, furor over publication of Uncle Tom's Cabin (1852), Kansas-Nebraska Act (1854), the Dred Scott Case (1857), the Lincoln-Douglas Debates (1858) and the presidential election of 1860

Reading Comprehension for 3rd Grade READING: Comprehension and Analysis of Nonfiction and Informational Text

3.2 Students read and understand grade-level-appropriate material. The selections in the www.doe.in.gov/standards/readinglist.html illustrate the quality and complexity of the materials to be read by students. At Grade 3, in addition to regular classroom reading, students read a variety of nonfiction, such as biographies, books in many subject areas, children's magazines and periodicals, and reference and technical materials.

Social Studies for 3rd Grade

3.1 Students will describe how significant people, events and developments have shaped their own community and region; compare their community to other communities in the region in other times and places; and use a variety of resources to gather information about the past.

Geometry for 3rd Grade Students describe and compare the attributes of plane and solid geometric shapes and use their understanding to show relationships and solve problems.

3.4.1 Identify quadrilaterals as four-sided shapes.

3.4.2 Identify right angles in shapes and objects and decide whether other angles are greater or less than a right angle.


Saturday, January 14, 2012

Wondering

I’ve been thinking about what I need to know before I begin my quilt.  I have made a list of questions to ask my friend when I call.  Here is the list:
1.      What is the best way to cut the shapes?
2.      Have you heard of or used an AccuQuilt?
3.      Is it worth purchasing?
4.      What is the best batting to use?
5.      How about backing?  Is there a best choice?
6.      What tips do you have before I begin piecing the shapes?
7.      What do I do once I have the top pieced, the batting in between the top and backing?
8.      Do I quilt from the inside to the outer edges?
9.      How do I get the large, bulky thing in my machine?
10.   Do you have any preventative tips that will keep me from really messing up?
With the list in hand, I am going to call her tomorrow afternoon after church.
"The important thing is to never stop questioning." - Albert Einstein "The real objective of education is to have a man in the condition of continually asking questions." - Bishop Creighton When I think about the kind of questions I ask as an adult, compared to the questions asked by children, I see that my questions tend to be about what interests me or about something I need to know about work. Children ask to understand basic needs. They develop more sophisticated questions as they themselves mature. "As children, our research focuses on understanding and manipulating our environment, usually aided by toys and parents and later by friends and teachers. As adults, our research needs diverge to unique interests - often related to our occupation, but also covering our family concerns and leisure activities" (Anderson and Kanuka 2003, 2). According to The Blue Book, questioning is the first of the five elements in information inquiry. The others are exploration, assimilation, inference and reflection. According to Dr. Lamb, Wondering is the questioning aspect in her model that I am following in the inquiry.

Thursday, January 12, 2012

Watching


Watching – I have watched and admired the artistic qualities of quilting for many years.  I love going to the county and state fair and experiencing the heritage reflected in the quilts.  I love to read about the times in American history when quilt making was a way of life and a time of social activities for the women.  I think we still have a need for the social aspect of quilting.  It’s fun just to get together and talk but create something at the same time.  Scrapbooking is a modern rendition of this social network.  Twice a year, I go on a scrapbook retreat with my friends.  We work on our family scrapbook, reminisce and have a great time.  I found that quilters do the same!  They pack up their fabrics, machines and supplies and retreat for a time of socializing and quilting.

I have purchased quilts for my home, but want to make one.  How to begin?  Many times when I want to do something I just jump in and do it. Sometimes the results are good, sometimes not so good.  I think I will get advice first.  I have a long time teacher friend whose mother is an expert quilter.  She has made many, many quilts and all are beautiful.  She gives them to her family as birthday and Christmas gifts.  The family treasures them because they are a part of her.  My friend’s mother also helps others develop their quilting skills at workshops and retreats.  My first inquiry will be to call her for advice.  Before I call her, I need to write out what I want to ask.  The subject of my next blog!
While I created this blog, I also created a Mobile version that can be accessed by a smart phone. I am attaching a screenshot of the Mobile version.